

Root shadowing is our low-maintenance hair color technique in which a darker shade is applied directly to the roots giving a soft, seamless contrast. It's a great way to refresh your look and give your hair color depth and dimension. Basically, a shadow root, is when your stylist goes back over your highlights or fresh color with a shade closer to your natural shade.

Notice the difference with no toning and the after the root shadow in. The highlights are stronger and bolder in comparison to when we root shadow, the highlights melt into your natural hair colour, creating a more softer and blended result. This will minimise significant roots in the weeks to come as when your natural hair grows through your demarcation line from the highlights will not be as blatant.
We know with the sudden inflation, the increase in the cost of living is putting a squeeze on people's finances, as wages fail to keep up. This is why we have introduced root shadowing as a popular alternative for those looking to have salon-fresh hair with a low maintenance finish.


Shadow Root Hair Is the Coolest Low-Maintenance Trend for 2022
If you haven't made it to a salon since the pandemic started, fear not, as your overgrown roots are actually trending. That's right—a shadow root is one of the coolest hair colors you can get this summer.
A little more elegant than months-old grow-out, but it is way less upkeep than your usual hair color. This not only gives your hair a cooler “lived-in” feel, it extends the life of your color by fading into your natural roots, instead of leaving a harsh demarcation line.
Ritzy's Hair loves this technique for both its ability to extend your grow-out, as well as adding pretty dimension. While a shadow root can be done on pretty much any shade, we particularly like to do it on our blond-hair clients. “I love it for its subtle contrast,”. Ask your stylist for brighter ends, with dimension through the midlength and less blond through the roots, and always brighter pieces around your face.
We predict it’s all going to be about the grow-out, whether someone goes very natural or a little extreme, you want your hair color to be able to grow out easily without having to touch up your roots as often. People are in need for their hair color to last longer and not feel that it needs as much maintenance and cost.
ROOT SHADOW VS. ROOT MELT—DO YOU KNOW THE DIFFERENCE?

Lets Break Down The Difference Between A Root Shadow & A Root Melt..
Placing a darker color at the roots is a great way to add much-needed dimension AND ensures the fade out is super seamless. Do you know the difference between a root shadow and a root melt? Lets get into it..
ROOT SHADOW
When: After traditional foil highlights that go all the way up to the roots.
Why: To blur or “shadow” the area at the roots where the highlight and natural color meet without completely covering up the highlights.
How: Apply the shadow root formula in horizontal sections to about 1-inch from the roots, leaving out the hairline foils for a brighter pop in the front. Usually processed for about 2 to 15 minutes.
What: Usually we aim for the root area to be one to two levels darker than the highlights. My favorite root shadow formulas are any combination of Loreal Shades 9.1,9.01,8,8,01,7,7.13,6,12.

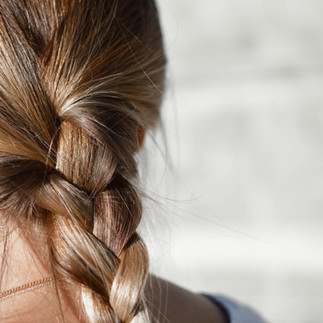
After a full head of traditional baby lights, your hair will look like this at the basin.
This is when you have the option to keep the highlights directly off the scalp or place in a shadowed root.
Decided on a shadow root, your hair will be sectioned into three equal parts, your facial hairline and parting will be left to develop last for an extra pop of brightness.

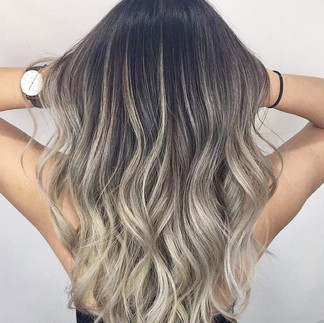
Here is the results after a root shadow.
The finish is seamlessly blended. You cannot see where the highlights begin, the demarcation is blurred and the brightness of the highlights is still popping, specifically towards the midlengths and ends.

Notice how the hairline and parting is popping bright, this will leave your face elevated, contouring and concealing the face and skin tone.
Let us know what your opinions are or leave a comment on our Instagram post for any quiereies..
Root Melt
When: After a teasylight foil when creating a rooty, lived-in look.
Why: To completely erase any demarcation lines so no one can tell where the natural base color ends and the highlights begin.
How: Apply the root melt formula about 1 inch past where the teasylights begin, which usually is about 2- to 3-inches down from the root. Process for 5 to 20 minutes.
What: We usually aims for the same level as the client’s natural color or a level darker depending on the desired look. My favorite root melt formulas are any combination of Wella Professionals Color Touch 7/89, 5/1, 6/0 and 5/0 or any combination of Loreal Shades 4, 5.12, 5.3, 6.01 and 7.11.
Notice how more lived in the results of these root melts we have created. We can also tailor the melt and have it melted lower or higher to your expectation. Bare in mind the lower you melt, the more dark you will feel.
Chose between
Low temples/ Highest cheekbone point

Jaw level

Collarbone level
